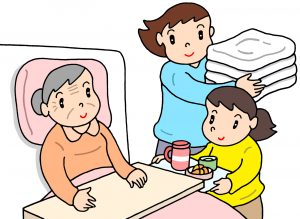
Sunday, 5 May 2013

I'm Having a Break


That's right. I've decided to have a break from my beloved blog {sob}. Why Debra? I hear you ask.

Well we're going on holiday on Friday and it's our first time abroad with the darlings. So being the control freak and organisational nutter that I am, I really need to focus on getting everything sorted, lists written, last minute essentials bought and the mammoth task of packing for a family of four going abroad for 10 days!

Somethings gotta give and unfortunately I've decided it's got to be my 3rd baby... my blog. Oh and there's no time for baking either. I'll miss blogging and baking but it's only for a few weeks.

Please don't all desert me as I'll definitely be back after our hols. I can't wait to share our photos and stories because we're going to have a fantastic time!

In the meantime think of me lying on my sunbed beside the pool with my kindle in one hand and a cocktail in the other. No wait I'm thinking of the type of holiday I had pre-kids! Oh well it might be a little different this time but as long as the darlings are happy, I'll be happy.


Friday, 3 May 2013

Strawberries and Cream Cupcakes


Another week, another cake sale at work! Honestly, they could single handedly keep me baking. It's always for a good cause though. Children In Need, Comic Relief, all the big ones. But this time it was in aid of a local charity The Oliver Field Appeal.

Oliver's mum used to work at the company where I work so, in addition to the cake sale, there were loads of fundraising activities going on.. wear what you like day, a raffle, breakfast delivered to your desk, a market stall event with lots of companies selling their wares, managers getting soaked in the stocks and my personal favourite was a five minute nail file and polish!

My contribution to the cake sale was these strawberries and cream cupcakes. This was another recipe that was on my baking to-do list. I adore strawberries and they're coming into season now and are so sweet and perfect looking. The whipped cream topping was compulsory to accompany the strawberries in my opinion. But if you're not a fan you could swap it for vanilla buttercream. Whatever you choose I can guarantee they will be gorgeous!

Strawberries and Cream Cupcakes

Makes 12
Preparation time 30 minutes
Cooking time 20 minutes

Cupcakes
80g unsalted butter, softened
280g caster sugar
2 large eggs
1/2 teaspoon vanilla extract
240g plain flour
1 tbsp baking powder
240ml whole milk

Topping
500ml double cream
12 whole strawberries

Preheat oven to 190C {375F} gas mark 5. Line a muffin tin with 12 paper cases.

In a large bowl, mix the butter and sugar with a hand held electric whisk {or a stand mixer if you're lucky enough to have one!} until it's light and fluffy. Beat the eggs in a jug with the vanilla extract and gradually add to the sugar/butter mixture. Sift in the flour and mix until fully incorporated but do not over mix.

Divide the mixture between the cases until they are about two thirds full. Pop in the oven for 18-20 minutes. A skewer inserted into the middle of the cupcake will come out clean when they are ready and when gently touched they will bounce back. Transfer to a wire rack and leave to cool completely before icing.

Whip the cream until it forms firm peaks. Spoon or pipe the cream onto the cupcakes and top with a whole strawberry.


Saturday, 27 April 2013

Smitten Saturday: Make-Up Brushes


Glasgow Mummy Sarah has created this fab linky idea which I just had to join in with. Each Saturday you write about one thing that you're loving... it could be a place, phrase, photo, food, make up, a person... anything!

Anyway, this week I'm smitten with my new Real Techniques Expert Face Brush and make-up brush roll. I'm currently obsessed with watching make-up tutorials on You Tube and my favourites are Tanya Burr and Pixiwoo who post fantastic videos showing you step by step how to recreate every type of make up look under the sun. I noticed that they both use the Real Techniques brush for applying foundation and it gives a beautiful flawless finish. So even though I'm really skint because we're going on holiday in a couple of weeks, I just had to buy it. Lucky me had millions of Boots Advantage points so I used some of them to buy the brush of my dreams! Of course I absolutely love it, my foundation looks amazing and stays put for much longer.

I already had loads of make-up brushes that were bursting out of my make-up brush holder so I thought I'd better invest in a bigger one. So I bought this one off  Ebay {sorry I don't know which brand it is} which holds 18 brushes. I threw one brush away that was looking very old and still had to double up in one of the pouches. But I love it. It'll be fabulous for keeping all my brushes neat and tidy on holiday!

So that's what I'm smitten with this week. What are you smitten with?


Friday, 26 April 2013

Ferrero Rocher Cake


When I asked my sister what cake she wanted me to bake for her birthday I was delighted when she said a Ferrero Rocher cake. Not because I'm a huge Ferrero Rocher fan {they're not really my cup of tea} but because I loved the idea of a cake with big chocolate balls on top!


We had planned to eat out for her birthday but my nieces have both got chicken pox so, instead, we all congregated at my parents house for a little tea party. The darlings had chicken pox last year so luckily they won't catch it again. Anyway, my mum hid the cake from my sister until after dinner but when the time came to bring it out she realised she didn't have any candles. All she had in the form of candles were lavender scented tea lights! Oh well they would have to do.

So after singing 'Happy Birthday' and blowing out the candle four times {each child had to have a go!} we cut the cake and had a slice.

All I can say is 'Oh My'! It tasted amazing. It's very rich and moist and a small {but not too small} slice is just right. 


Ferrero Rocher Cake

Preparation time 35 minutes
Baking time 30 minutes

Cake
50g cocoa powder
6 tablespoons boiling water
3 large eggs
100g softened butter
275g caster sugar
50ml whole milk
175g self raising flour
1 rounded teaspoon baking powder
 
Filling
200g Nutella
 
Nutella buttercream
225g unsalted butter, softened
200g icing sugar
1 teaspoon vanilla extract 
125g dark chocolate {70% cocoa solids if poss}
100g Nutella
Pinch of salt
 
Decoration
10 Ferrero Rochers
100g chopped hazelnuts
 
Preheat oven to 180C {350F} gas mark 4. Grease two 20cm {8inch} deep cake tins and line the bases with baking paper.
 
Make the cake
Sift the cocoa powder into a large bowl, add the boiling water and mix together until a smooth paste forms. Add the eggs, butter, sugar, and milk and beat with a hand held electric mixer until fully combined. Sift in the flour and baking powder and beat again until the mixture becomes a smooth thickish batter.
Divide the mixture equally between the prepared tins and pop in the oven for 25-30 minutes. The cakes will be ready when a skewer inserted in the middle comes out clean and when gently pressed with a finger, the cake springs back. Leave to cool in the tins for a 10 minutes, then turn out onto a wire rack to cool completely.
 
Make the buttercream
Break or chop the chocolate into small pieces then gently melt in a heatproof bowl placed over a simmering pan of water. When it's mostly melted, give it a good stir and leave to cool slightly for a few minutes. 
 
Sift the icing sugar into a large bowl and add the butter. Beat with an electric hand mixer on medium speed for about 2 minutes. Add the vanilla extract and the melted chocolate and beat on medium speed for another 2 minutes. Add the Nutella and pinch of salt, and beat on high speed for another minute.
 
Assemble the cake
Place one of the cakes onto a plate or cake board. Spread the Nutella onto the cake using a palette knife then place the other cake carefully on top. Spread the buttercream around the sides and top of the cake until it is fully covered. You should have enough buttercream to give it a good thick covering. Don't worry about getting the sides really smooth as this will be covered with the chopped nuts. 

Chop the hazelnuts as finely as you want. I found it easier to leave them in the packet then bash them with a rolling pin until they were in small  pieces. Gently press them into the side of the cake and brush away any excess that falls off.
 
Decorate by placing 9 unwrapped Ferrero Rocher chocolates around the edge of the cake with one still in it's wrapping in the middle.

Tuesday, 23 April 2013

Cheesecake Brownies

cheesecake brownies

I made these Cheesecake Brownies to celebrate a very very special bit of news for our family. Oliver was accepted into our first choice of primary school! Our first choice was the primary school where he currently goes to nursery, however we're just out of the catchment area. Put it this way... if we lived on the other side of our street we'd be in the catchment area! It's also a 5 minute walk from our house and 1 minute from my parents house {they'll be taking Oliver to school every other week} whereas the school we're in the catchment area for is about 20 minutes away and has a bit of a reputation of being full of snobs! I had convinced myself he wouldn't get into our preferred school to prepare myself for being disappointed.

So after a very tense couple of days waiting for the letter, it finally arrived on Thursday morning. I was at work but had given Hubby strict instructions to open it and ring me immediately. When he rang me and told me Oliver had got in I did lots of whooping and fist pumping! Over the moon is an understatement!

cheesecake brownies

Anyway, as you know I'm slightly obsessed with chocolate brownies. I'm also slightly obsessed with cheesecake. When we eat out I always choose cheesecake if I have dessert. I'm always on the search for ways of adapting or adding things to brownies so when I recently discovered the concept of cheesecake brownies I just had to have a go. As if regular brownies weren't indulgent enough with their rich deep chocolatey fudgy flavour, the tanginess of the cream cheese perfectly compliments it... it's a match made in heaven!

cheesecake brownies
The swirly pattern on top didn't quite work out but they still taste divine!
 
Cheesecake Brownies

Makes 16 {or 9 if you want really big brownies!}
Preparation time 25 minutes
Baking time 30 minutes

Brownie mixture
200g dark chocolate
200g unsalted butter
250g caster sugar
3 large eggs
2 teaspoons vanilla extract
120g plain flour
100g milk chocolate cut into chunks

Cheesecake mixture
200g full fat cream cheese {room temperature}
1 egg yolk
75g caster sugar
Preheat oven to 180C {350F} gas mark 4. Line a 25 x 20cm baking tin with baking paper or foil.

Melt the butter and chocolate together in a heatproof bowl over a simmering pan of water or in a microwave on 50% power in 30 second bursts. Give it a really good mix and set aside to cool slightly.

Beat the eggs, sugar and vanilla extract in a large bowl until really thick and creamy. Beat in the chocolate mixture, then add the flour and fold in gently, until the flour is just combined. Pour into the prepared tin. Sprinkle the chocolate chunks over the brownie mixture in the tin.

In a clean bowl, beat all the ingredients for the cheesecake mixture until smooth. Dot heaped teaspoonfuls of this mixture across the top of the brownie batter in the tin, then use a skewer or knife to swirl the two mixtures together, right across the tin and up to the edges.

Pop in the oven for 30-35 minutes. When ready it should be set and crispy on top but still gooey in the middle. Gently wobble the tin and the middle of the brownie should slightly wobble when it's ready.


Leave to cool for at least 2 hours before you even attempt to cut it. If you cut it up too soon, the brownie will leak all over the place. Cut into squares and give the squidgy middle slices to those you love the most.


Don't forget to enter my fantastic giveaway for your chance to win a family ticket the the Blackpool Tower attractions!

Related Posts Plugin for WordPress, Blogger...